Montage
Flexible. Sûr. Robuste.
Tous les écrans Fullwhite® se montent de la même façon, quelle que soit la taille. Le montage d'un écran Fullwhite® est simple et intuitif.
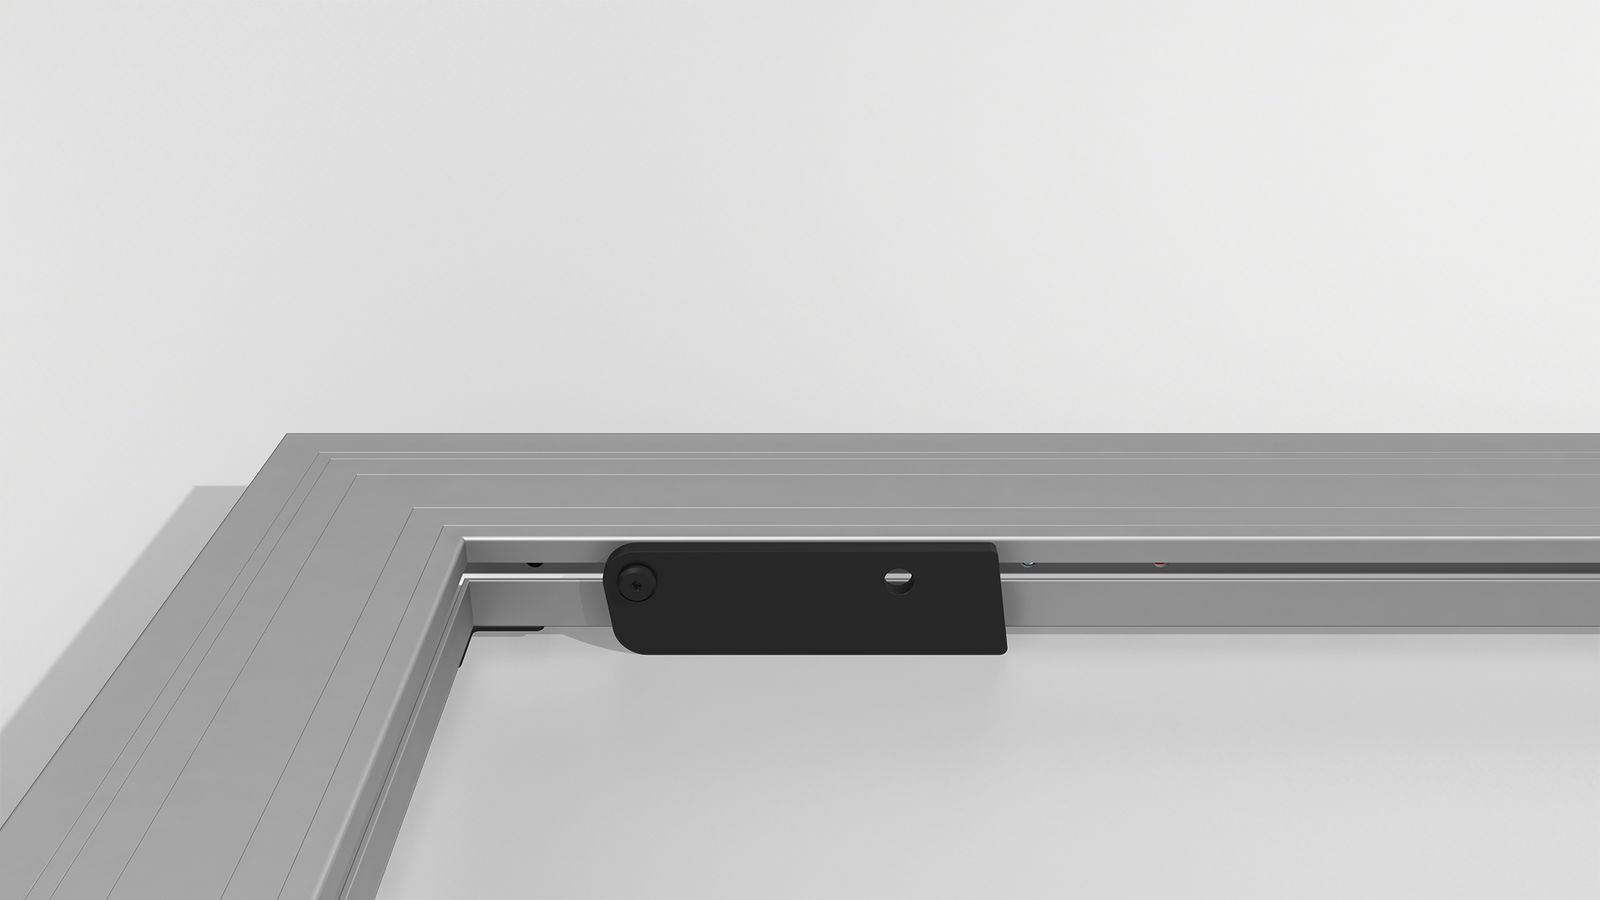
Set up support
Foldaway legs hold the projection screen’s frame in position above the floor to allow the surface attachment from top.
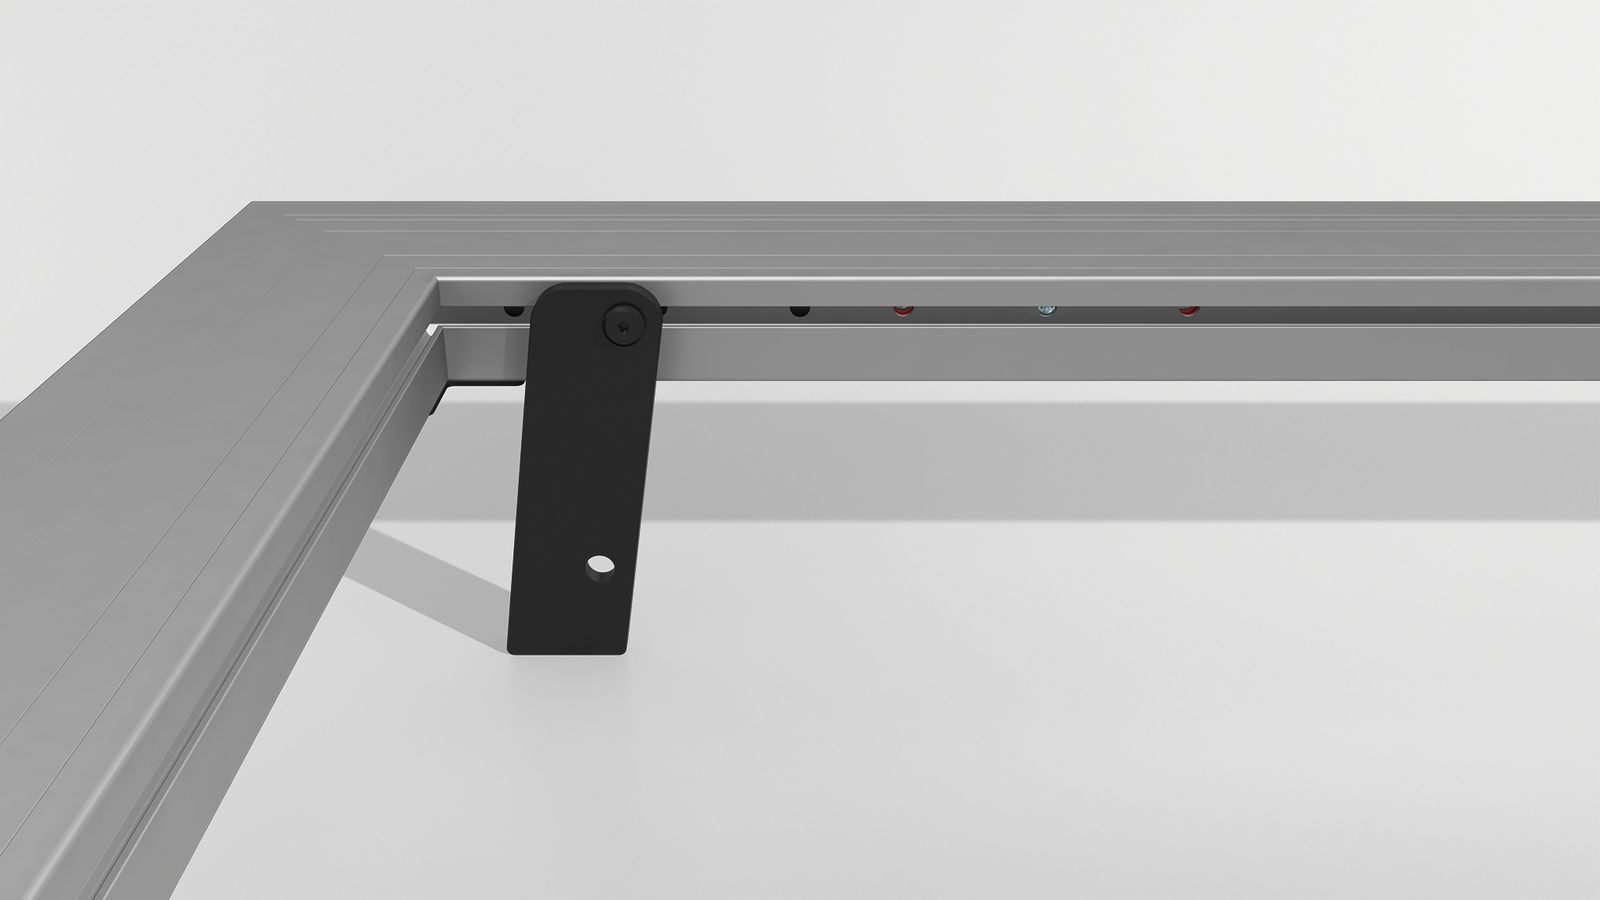

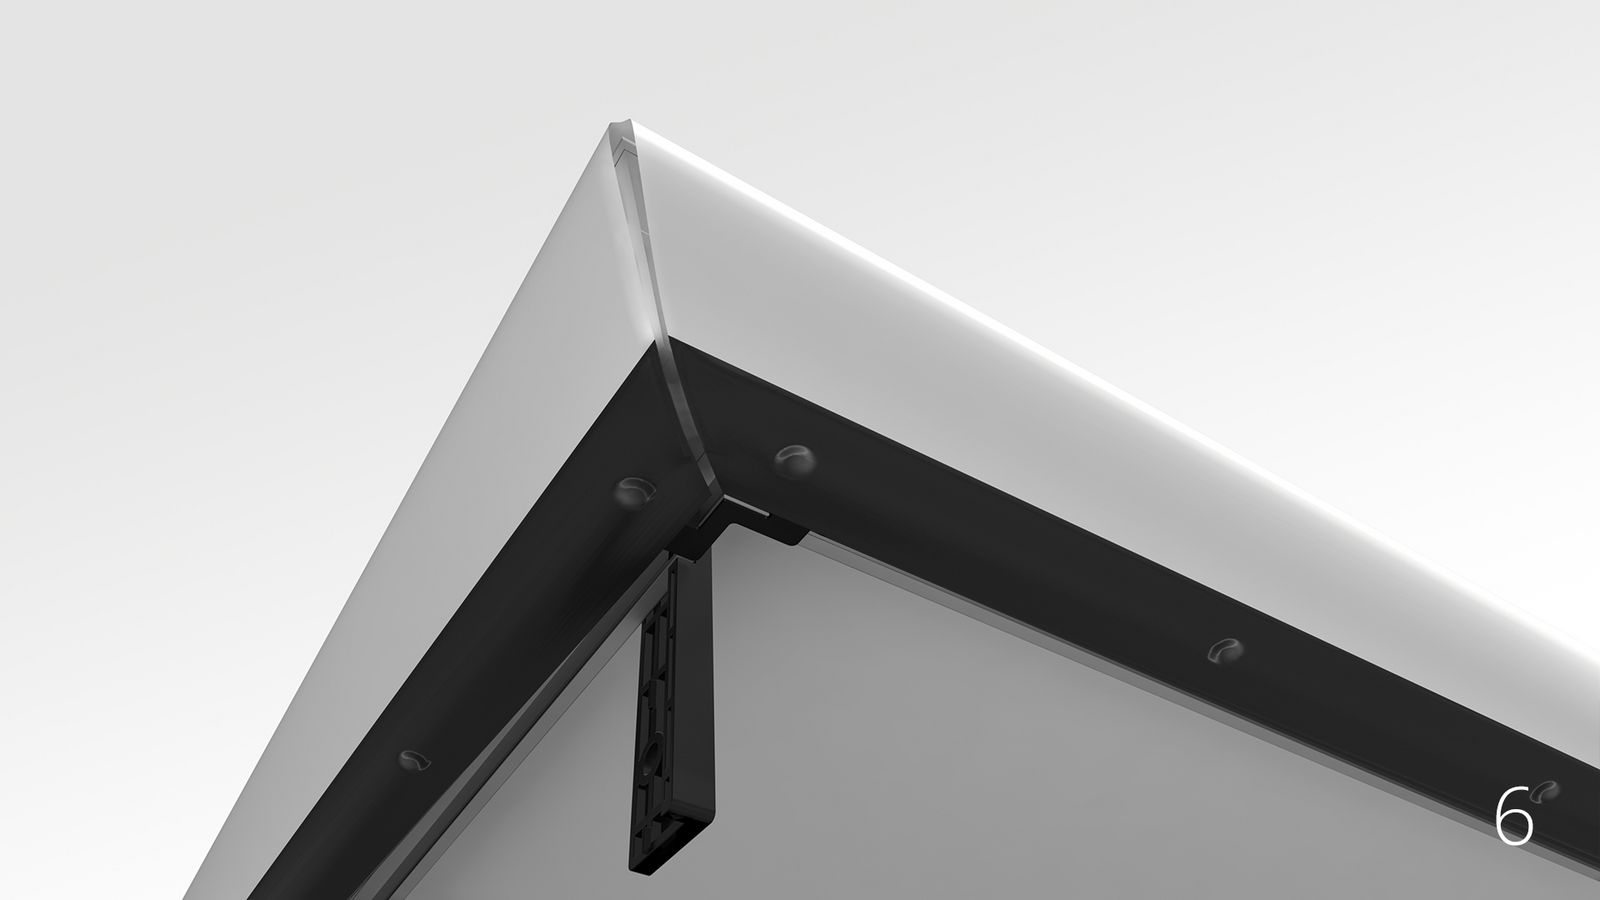
Raising support
When the surface has been attached to the Fullwhite® projection screen frame and the screen needs to be raised these devices keep the projection screen away from the floor to prevent damaging of the sensitive surface.
Frame mounting with set up support
Protective foil
Before you unroll the projection surface with the projection side down, the floor has to be cleaned completely and the supplied protective foil has to be laid out. The protective foil is to prevent dirt and damage of the projection surface.

Frame Mounting
Detailed instruction for SET UP SUPPORT (optional accessory) on page 13
NOTE: SET UP SUPPORTS can remain folded up on the frame after mounting.
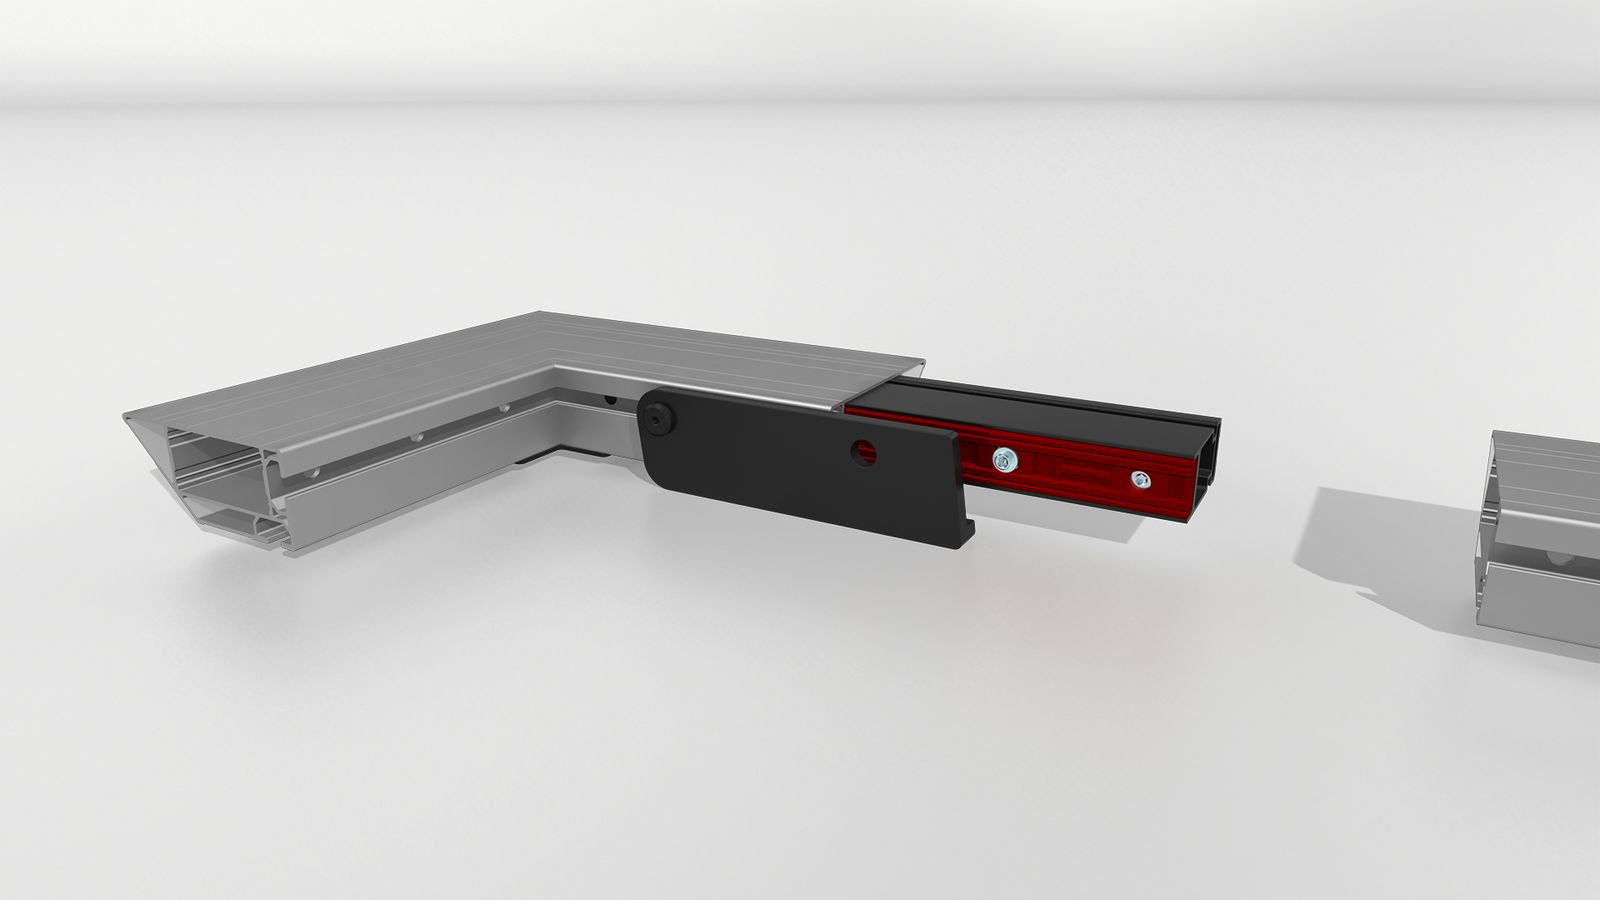
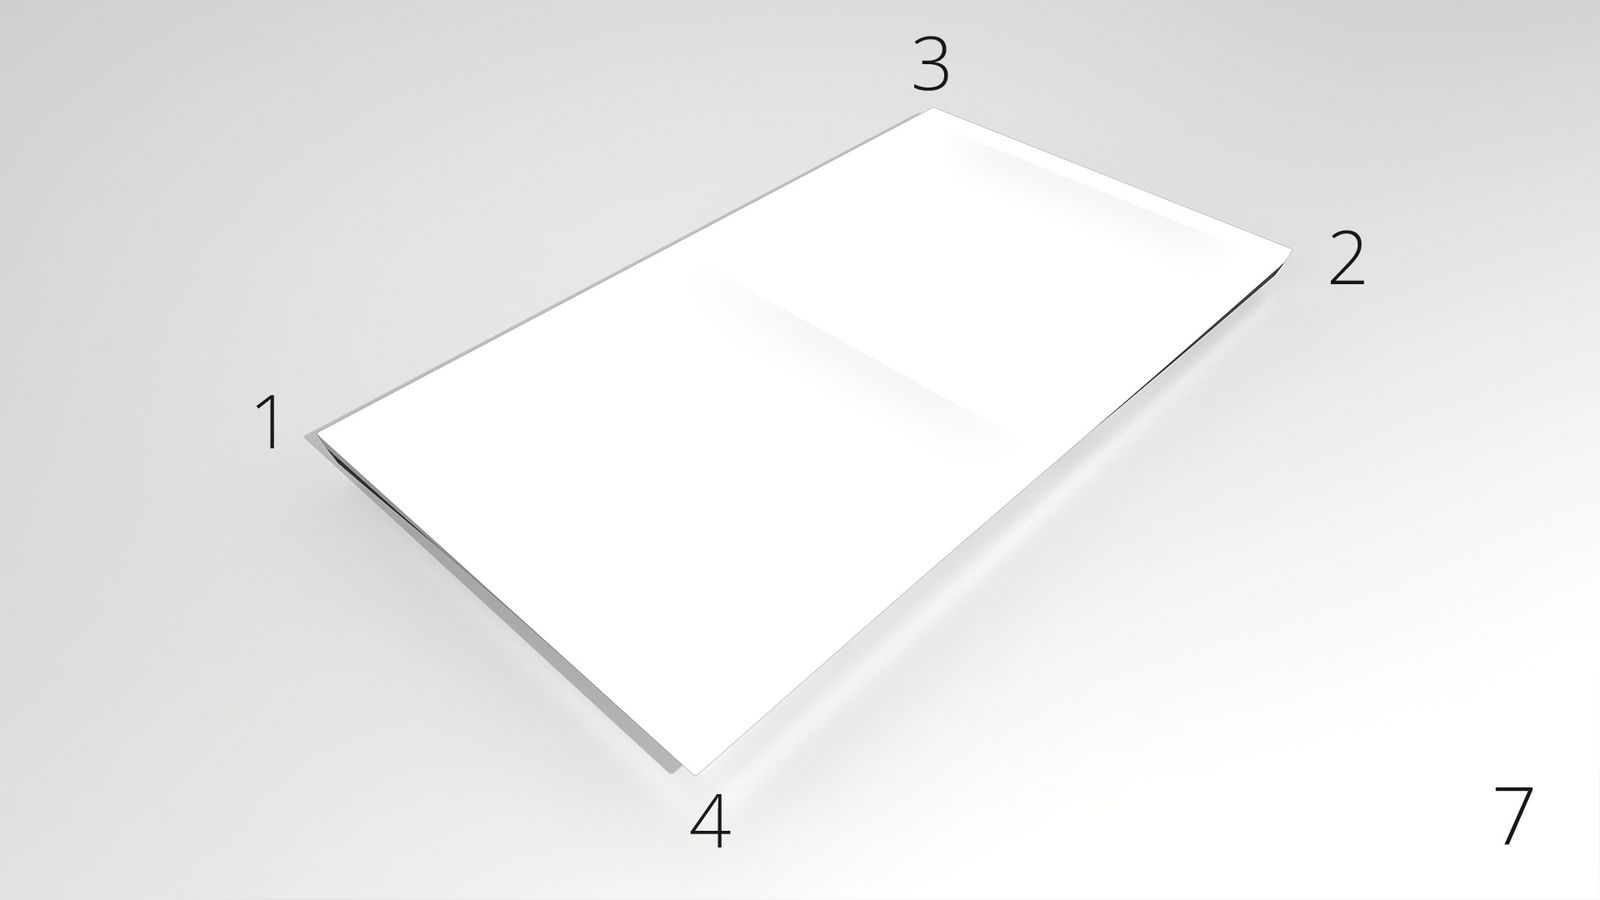
All components of the projection screen are labeled. For assembly, start with the basic frame. Place the corner elements 1 to 4 according to drawing above. Afterwards separate the frame components to „horizontal“ and „vertikal“ and halve the number for each frame site. Put together the connected upper and lower horizontal frame elements with corner parts on each end.
Clamp the connection by turning the two clamp screws clockwise and secure the connections with the center safety screw. Next plug in the vertical elements, clamp and secure them in the same way. The vertical connections must always be secured with the center safety screw!
In order to meet international safety requirements during flying applications the clamp connection must be locked with the integrated safety screw.
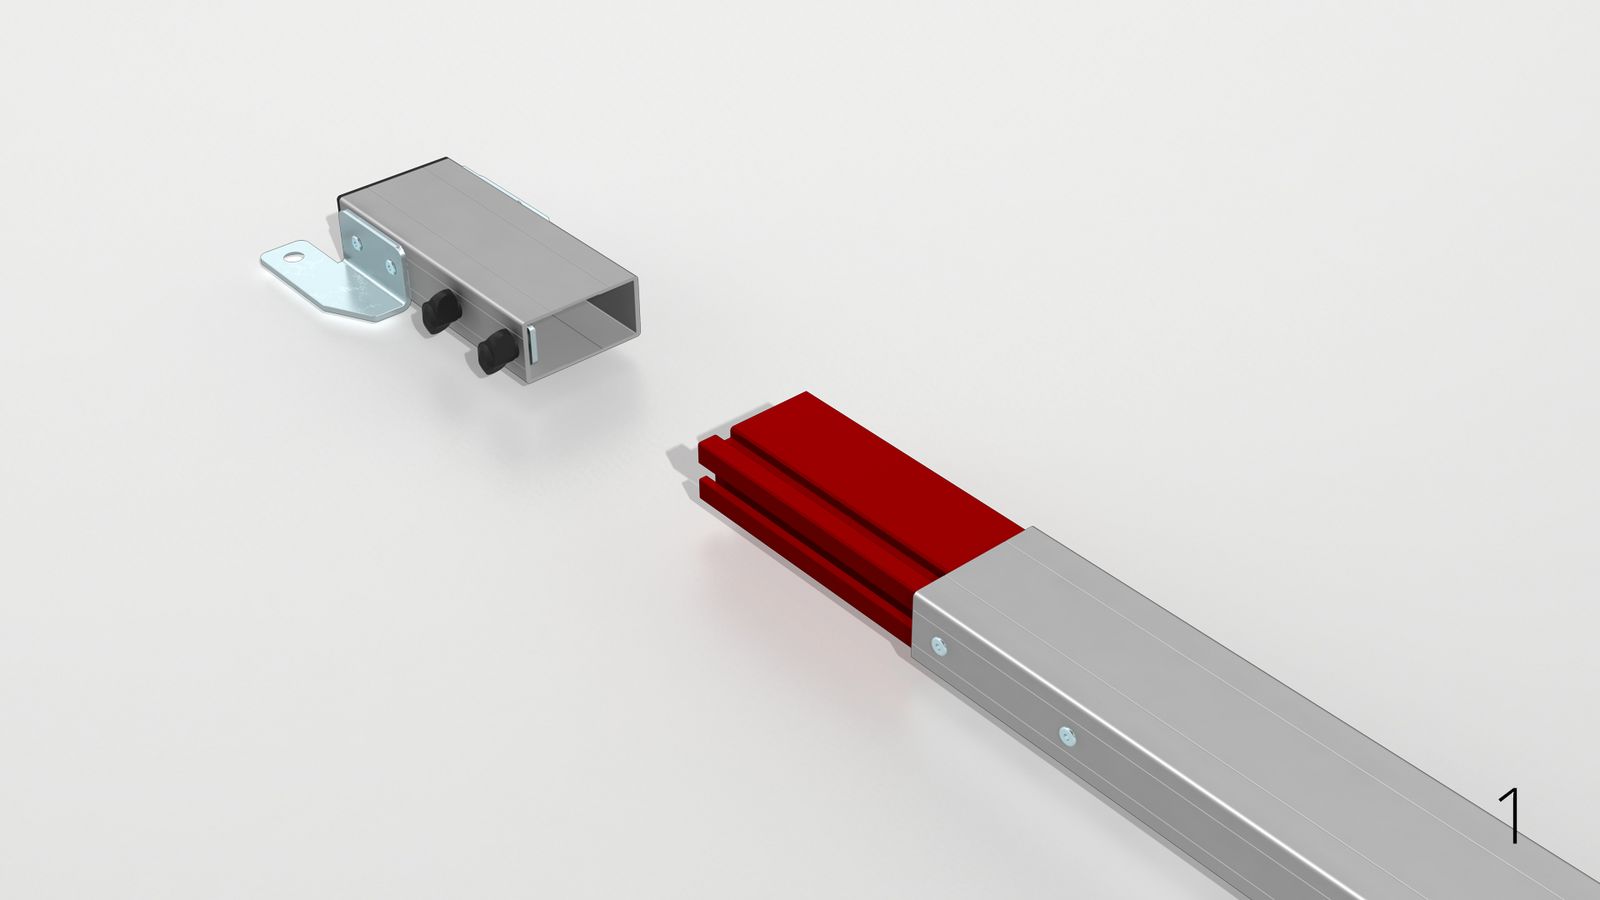
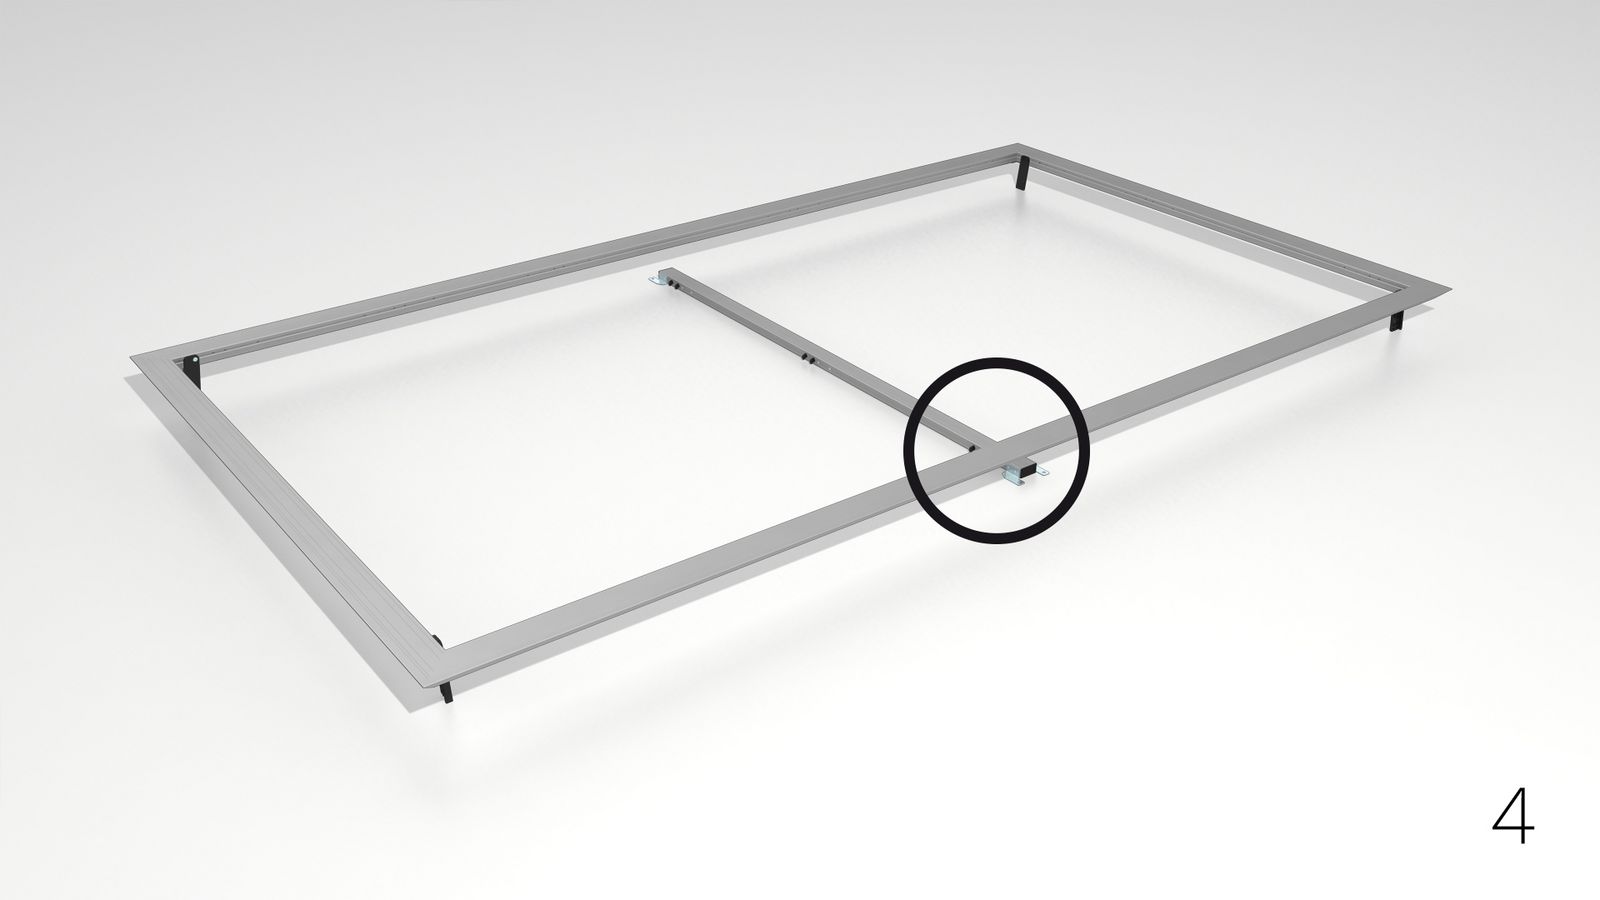
Center support
1-2 Put together the center support according to the labels and secure the connections with the two wing nuts.
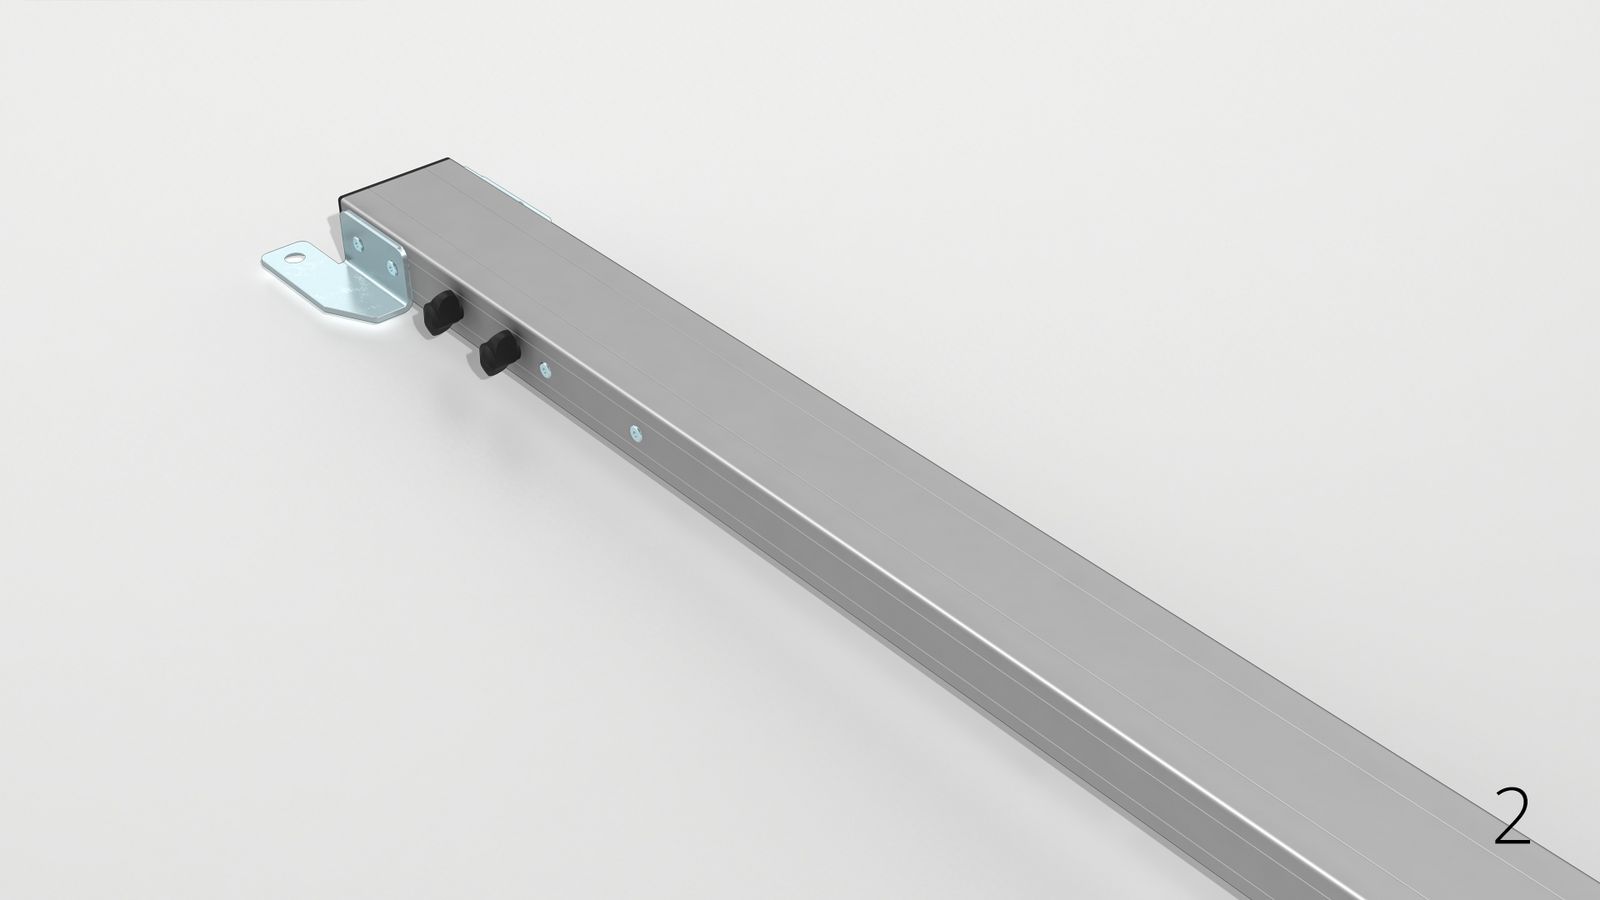
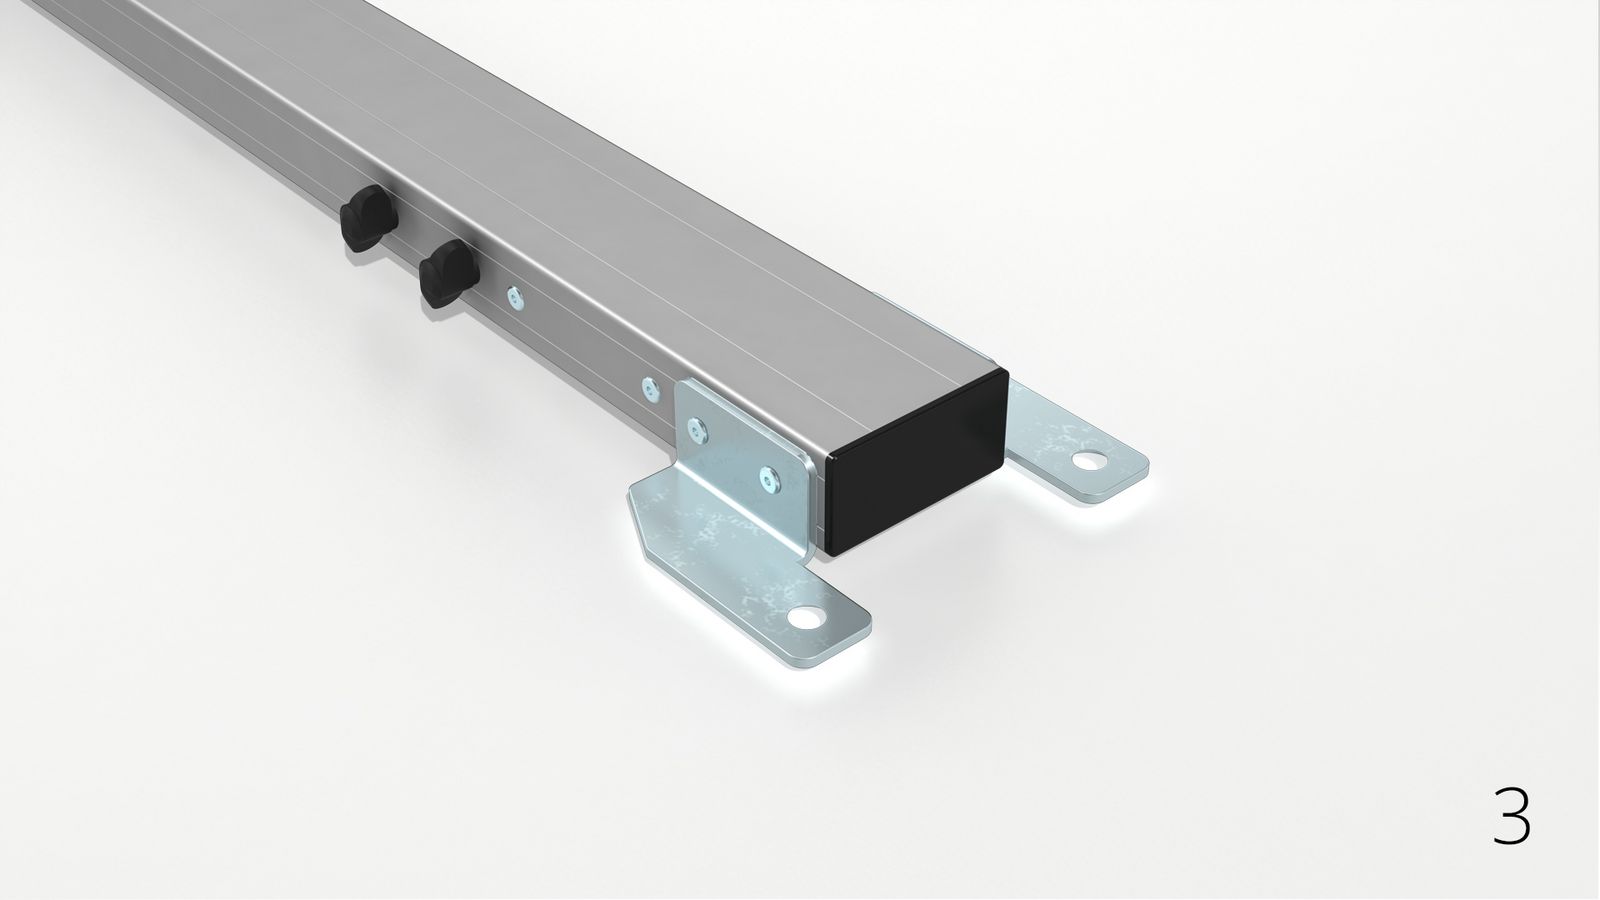
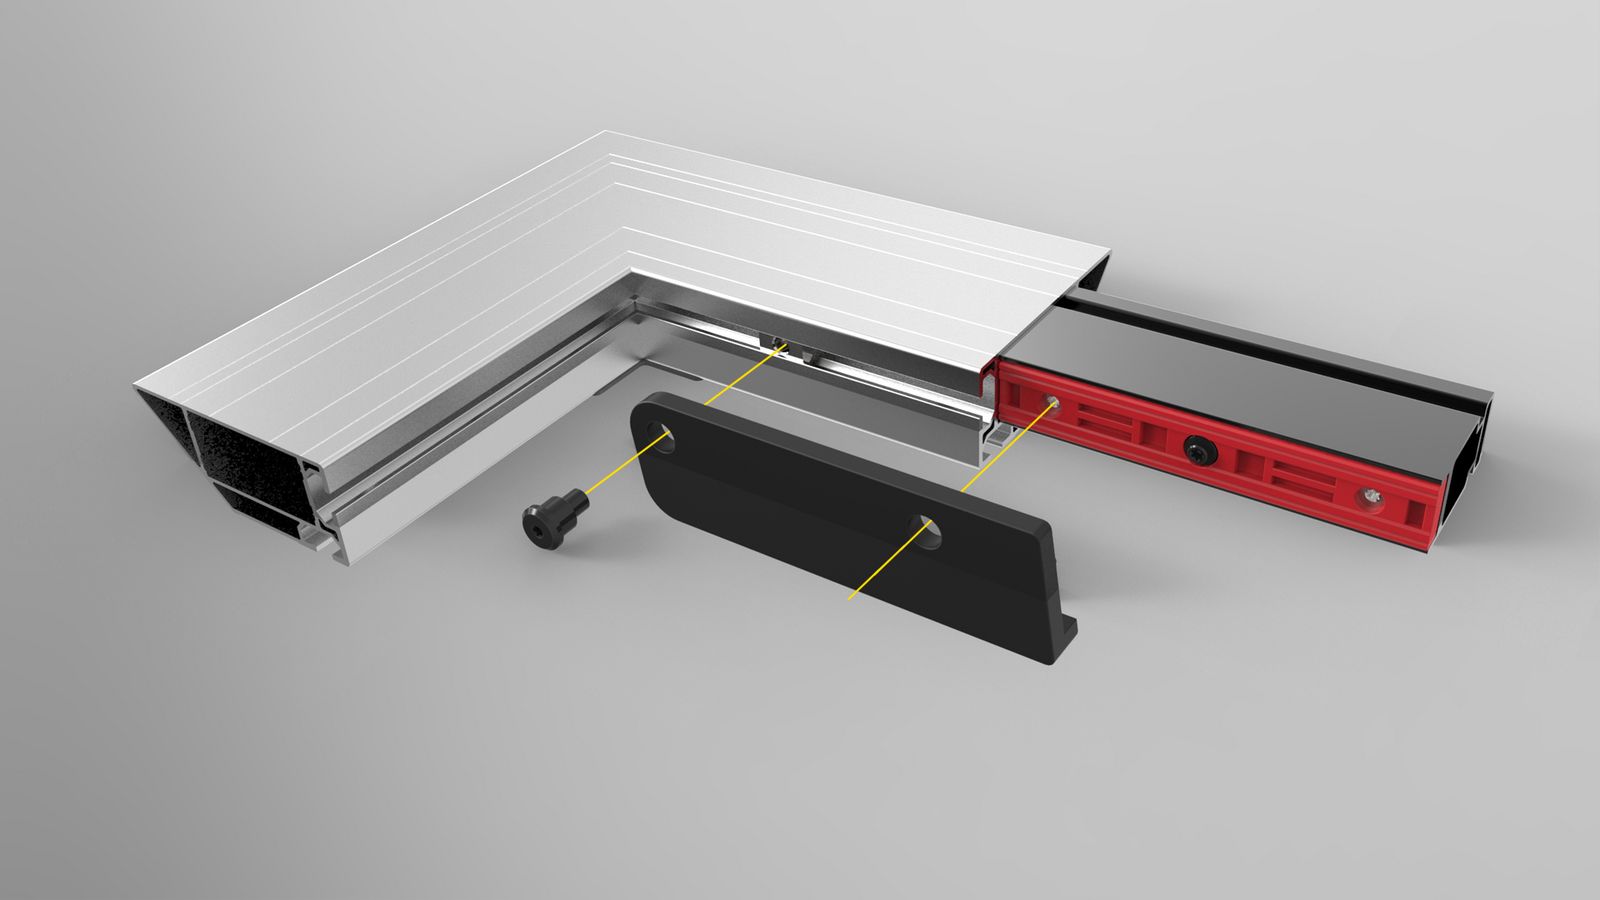
3 Detach the T-nuts from the top and bottom center support element and insert
them into the inner slot of the horizontal frame bar. (For the insertion of the T-nut refer to page 13)
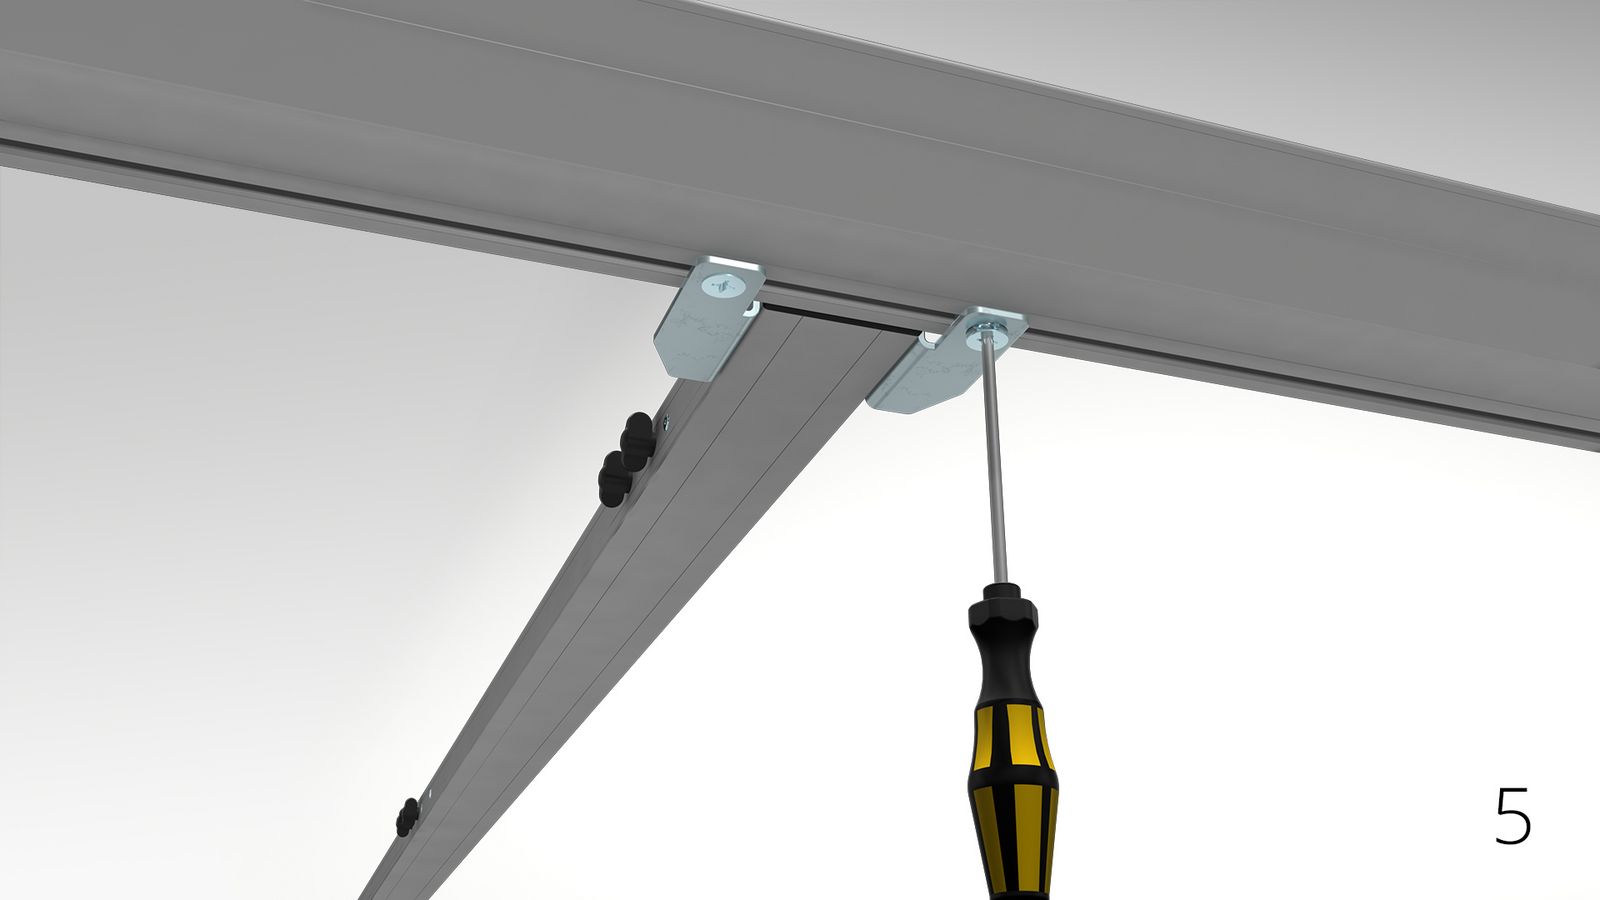
4-5 Place the center support and secure it on top and bottom with the Phillips screws. Screwdriver not included.
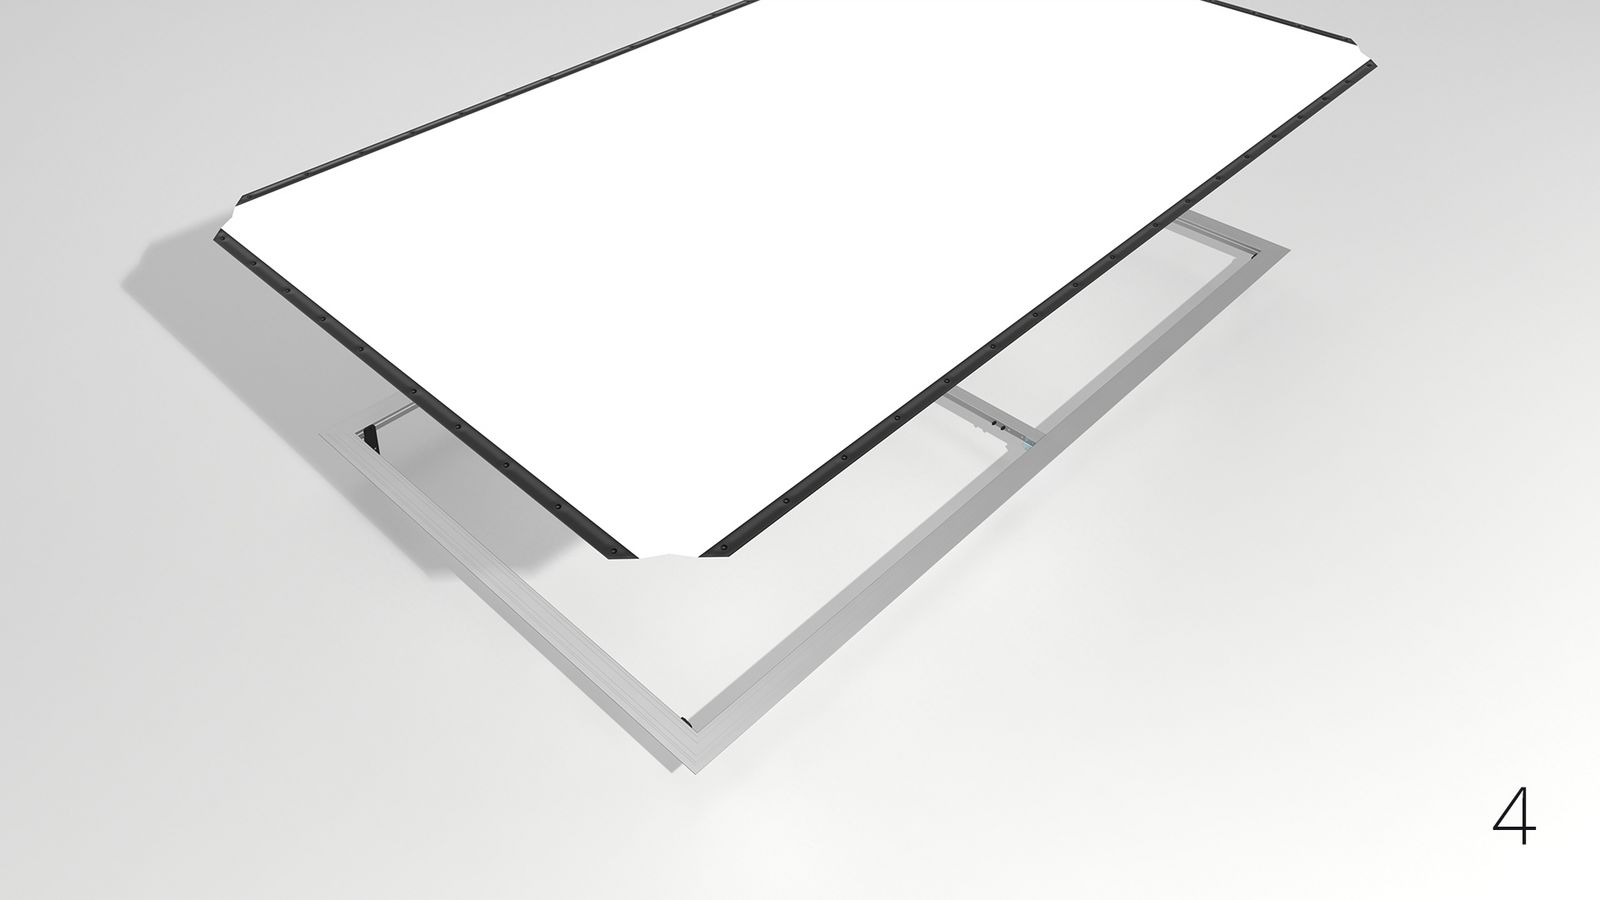
Surface attachment
1-2 Foldaway legs hold the projection screen’s frame in position above the floor to allow the surface attachment from top.
3-4 Lay out the surface on the frame with the label „OBEN-TOP“ corresponding with the upper frame bar. It is necessary to carry out this step with several people to avoid damage of the projection surface.


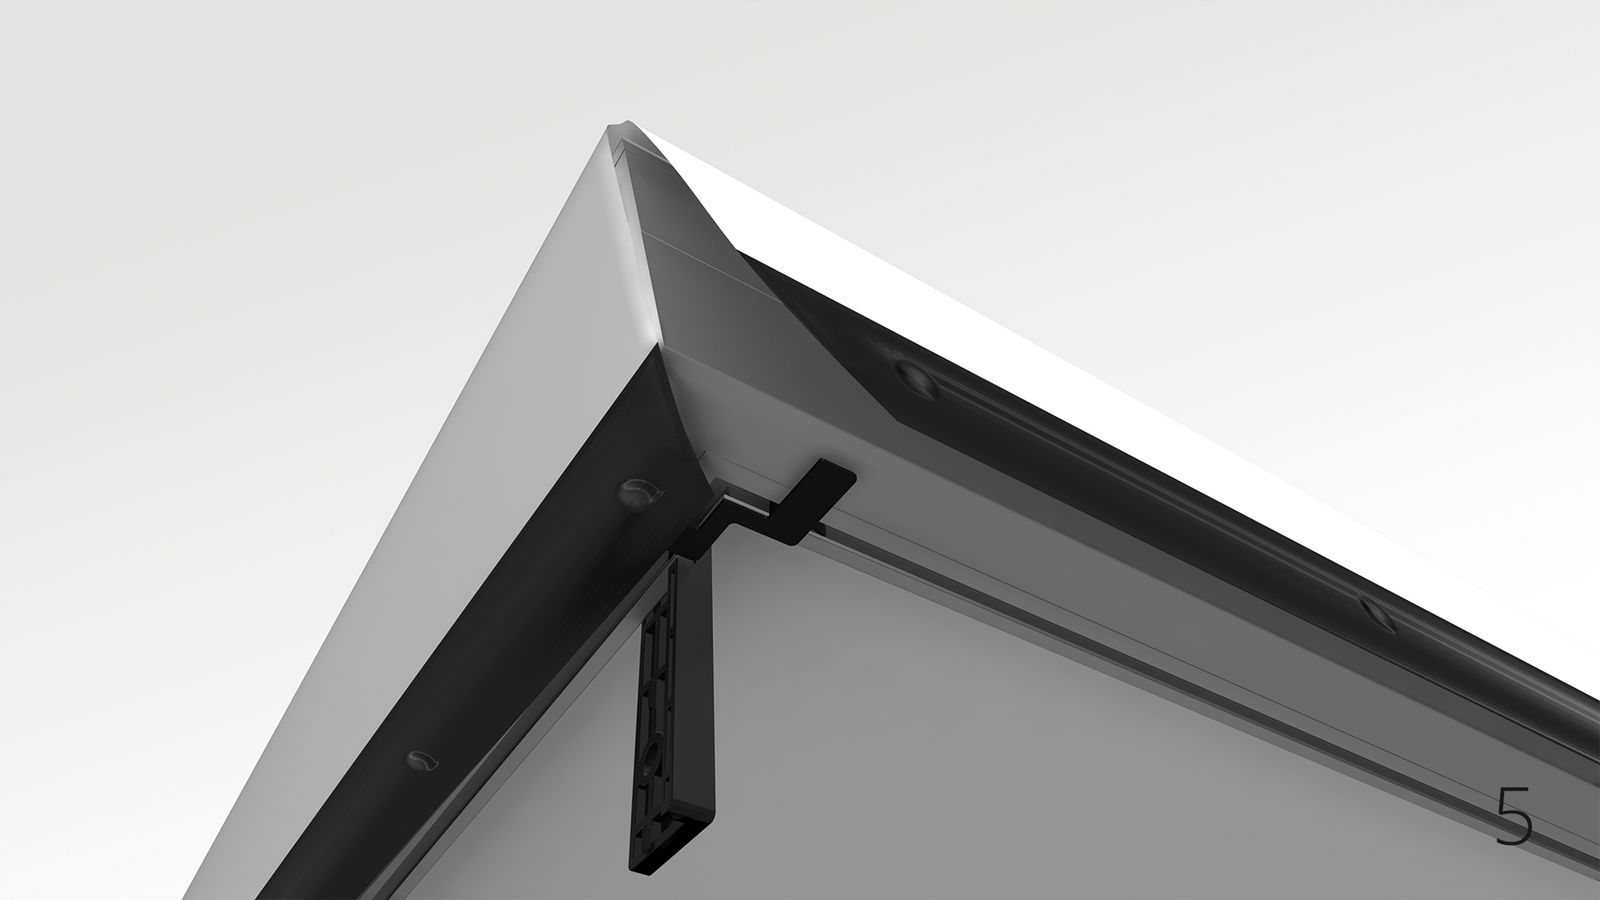
5-6 Attach the surface by starting at the first corner to fix one vertical and horizontal hook to the corner clip. Repeat this step according to the order in picture 7.
Finally stretch all the remaining hooks one by one over the profile edge and put them into the bottom profile slot.
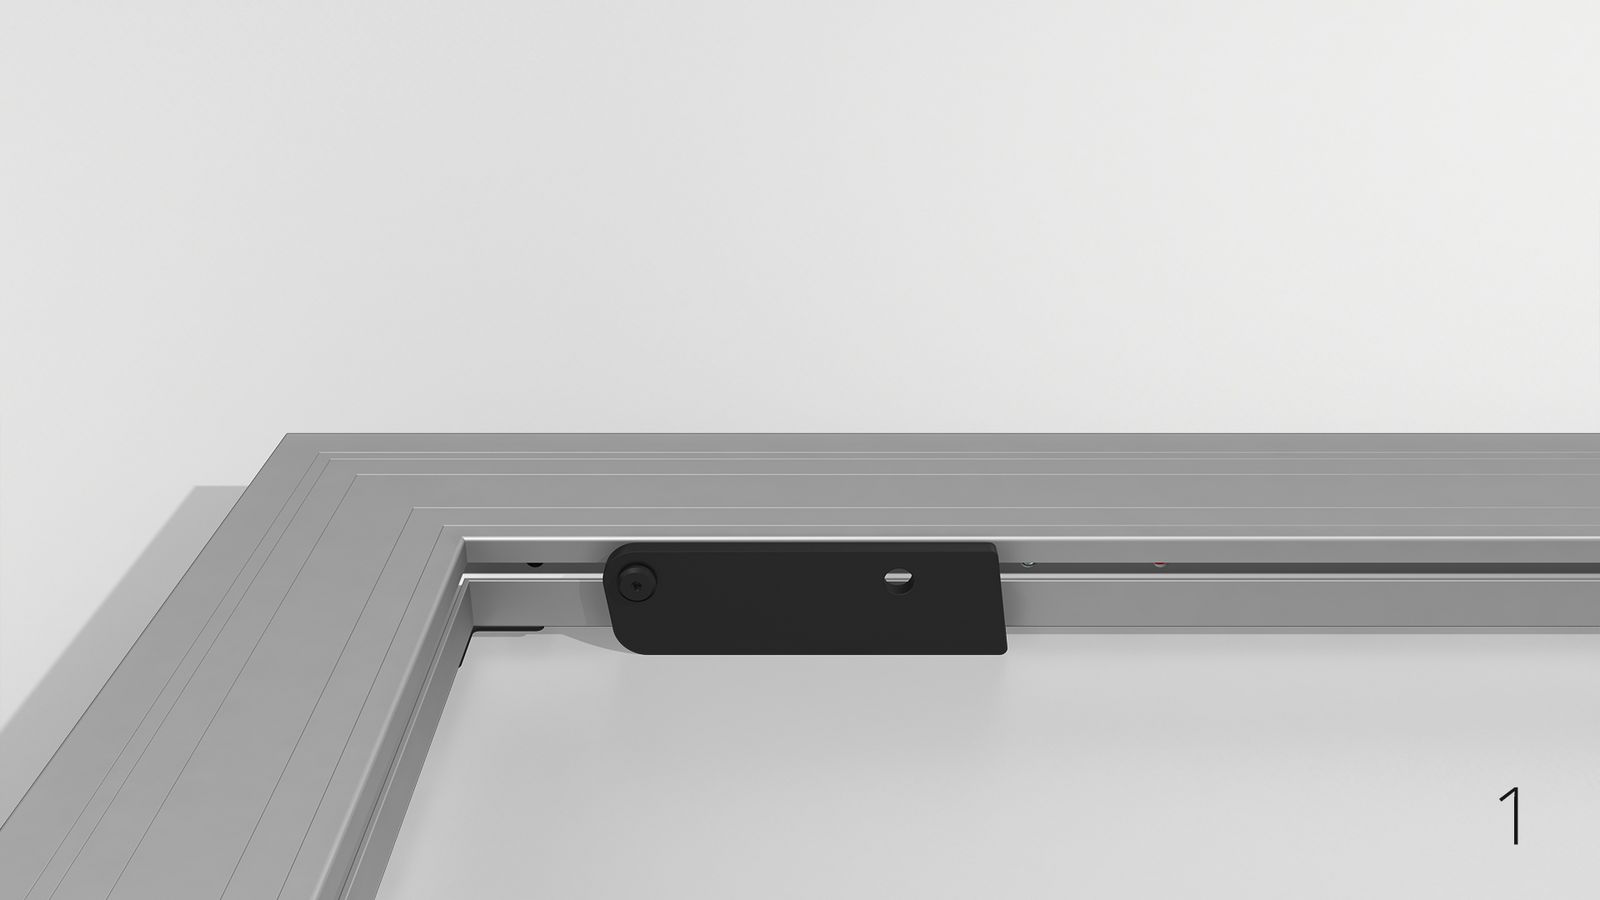
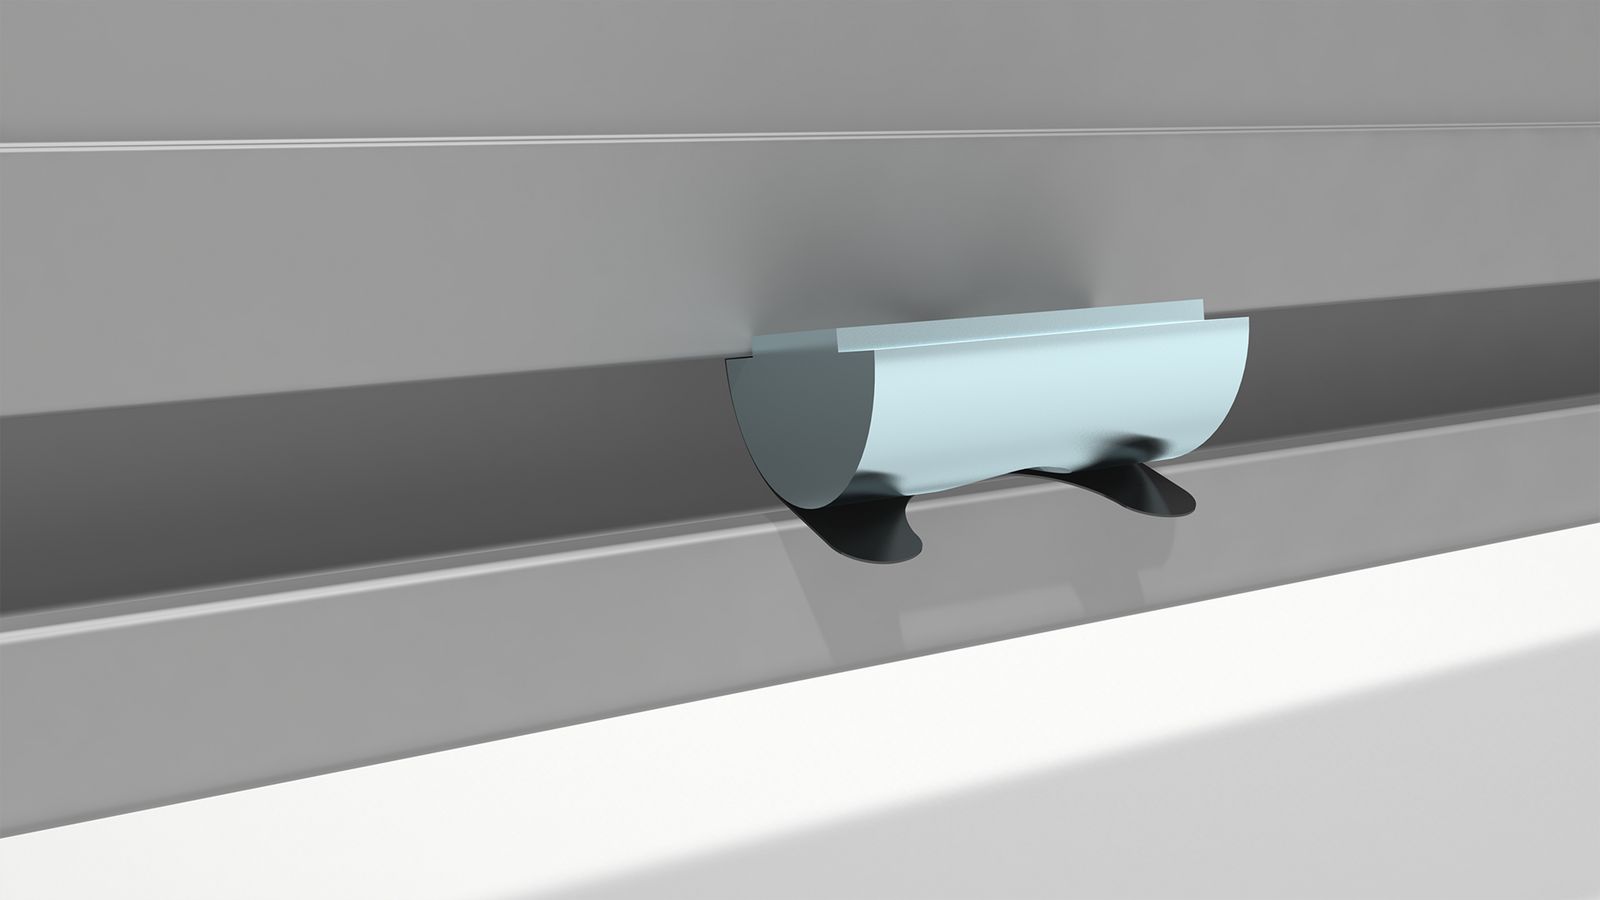
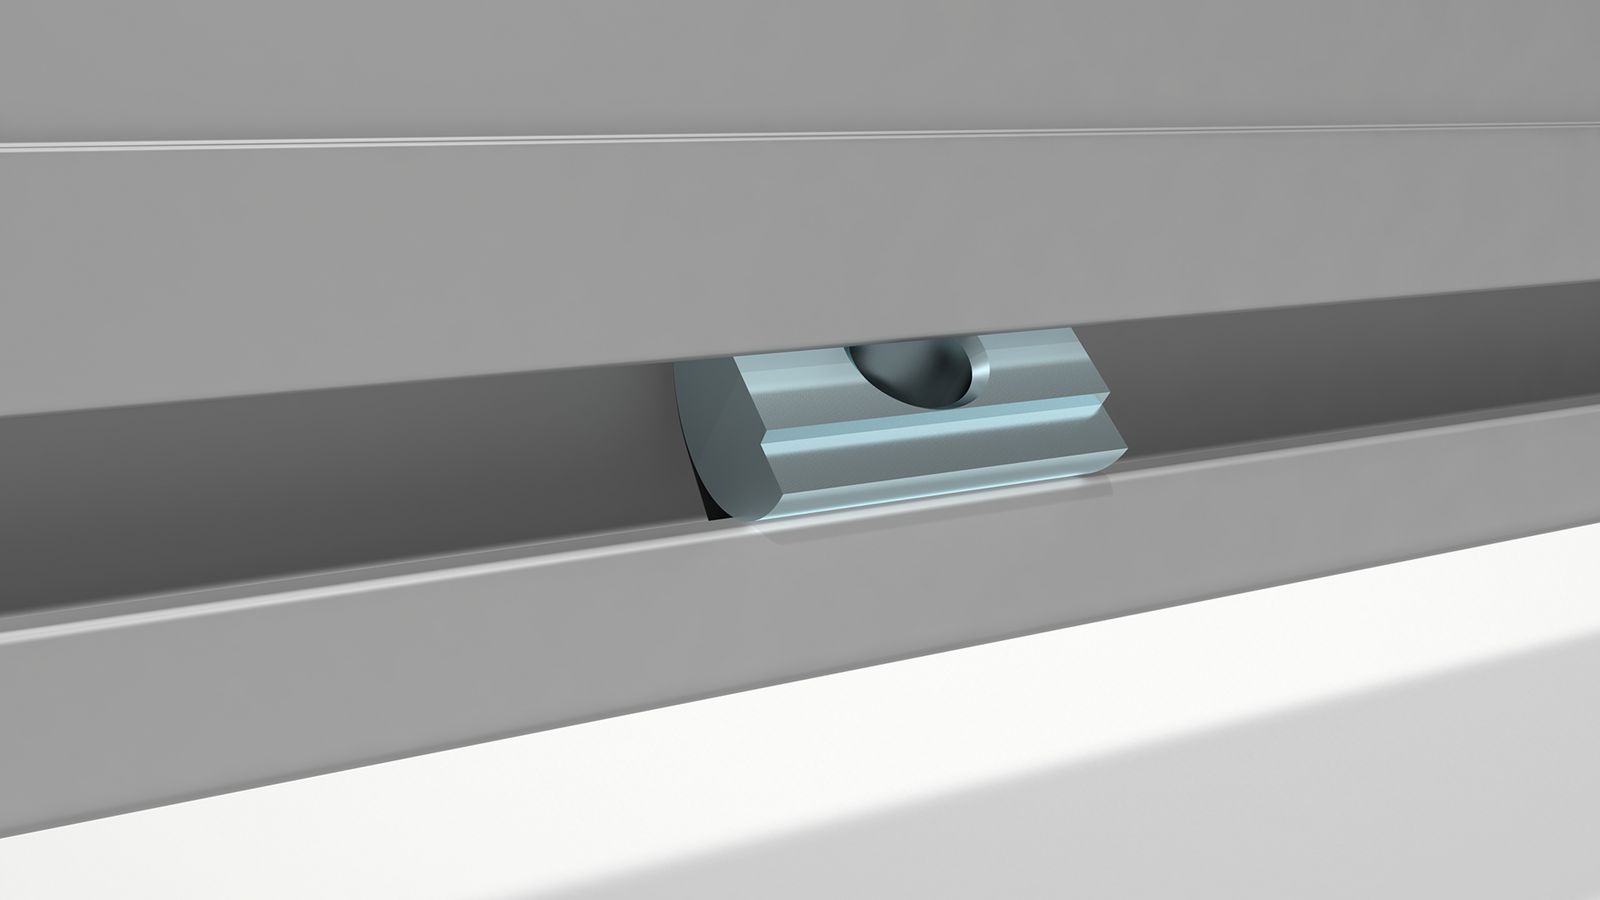
T-nuts
General attachment of T-nuts M8 with flexible tongue (Different to the illustration above, the T-nuts M8 for SET UP SUPPORT is equipped with a spring loaded ball)

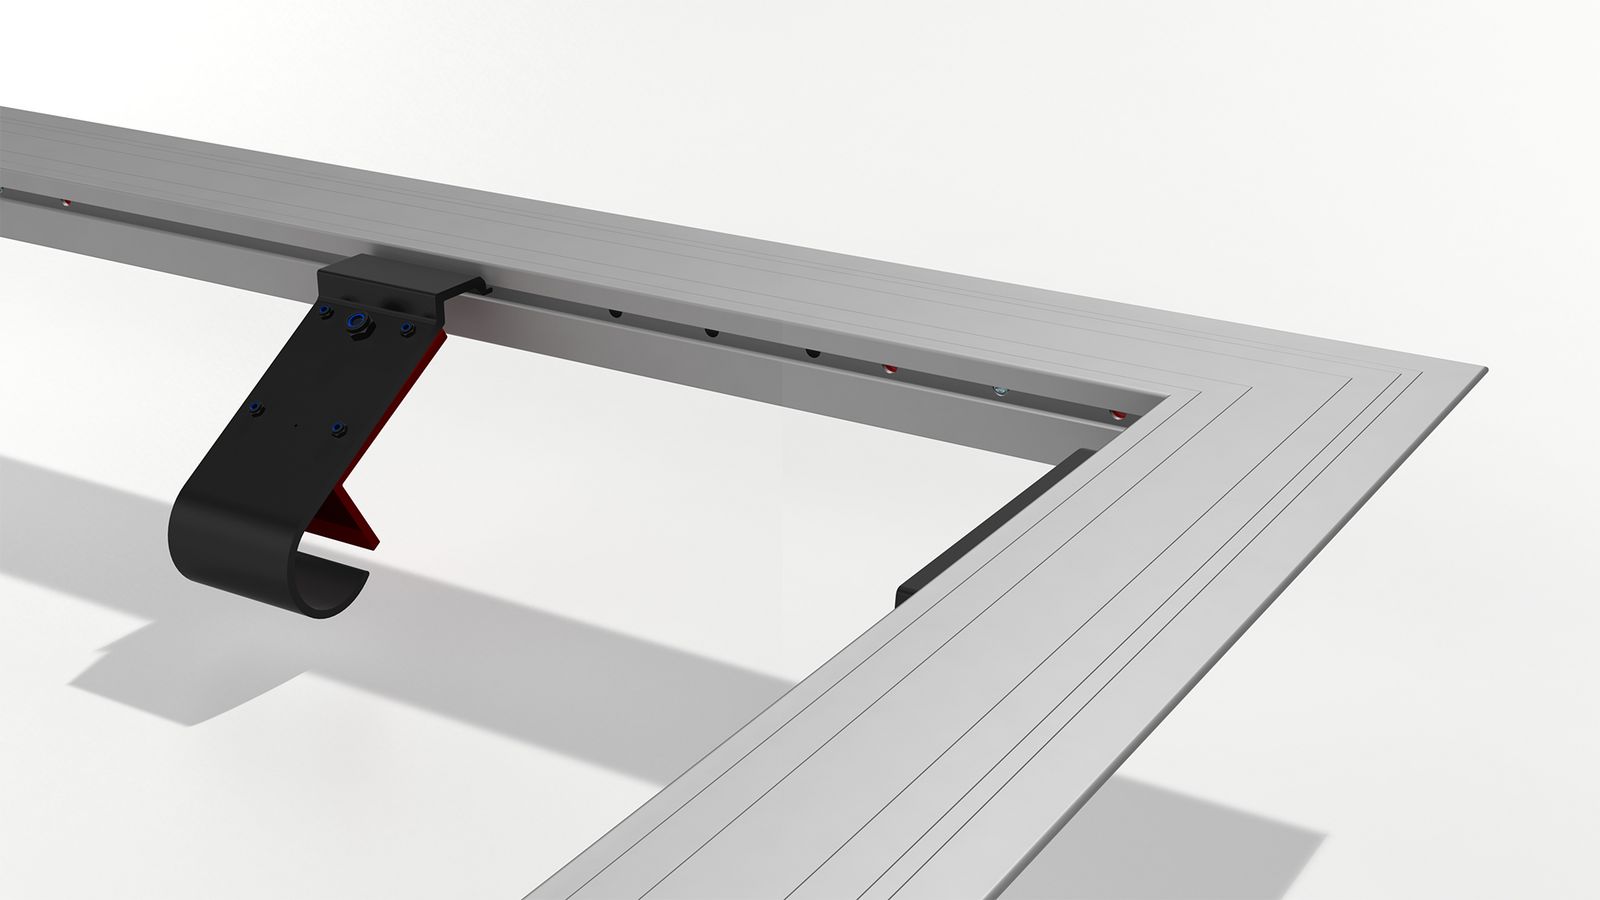
The installation of the projection surface with large FULLWHITE is done by using SET UP SUPPORTS. Those foldaway legs hold the frame approx. 12 cm above the floor to allow the surface attachment from top.
Laying out the projection surface and the frame on the ground is no longer necessary.
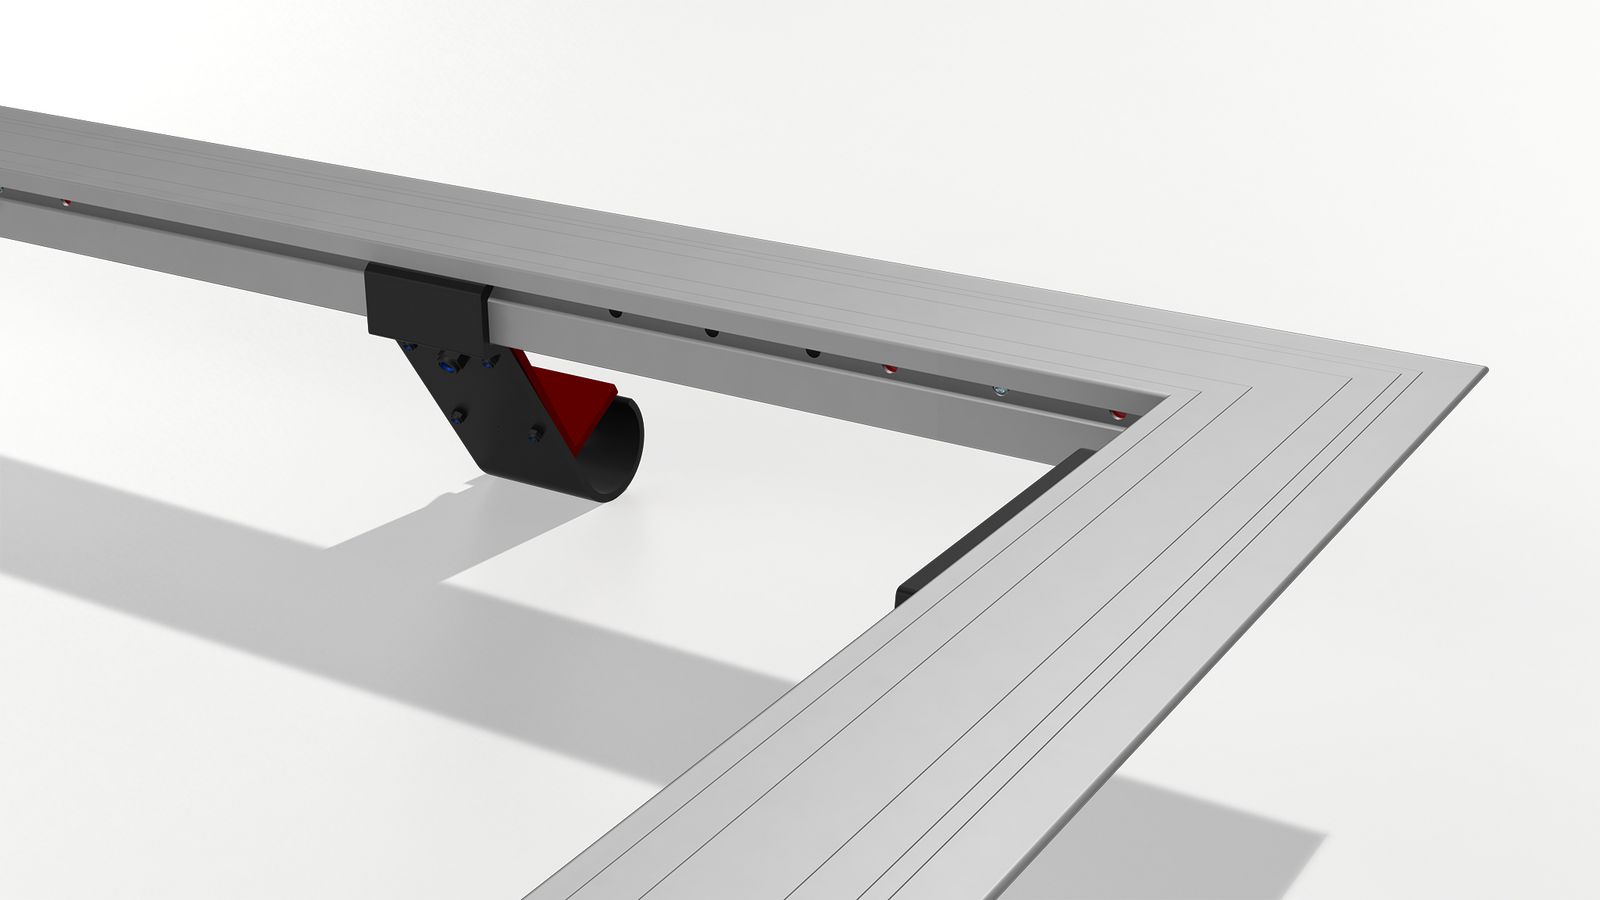
NOTE: SET UP SUPPORTS can remain folded up on the frame after mounting. The SET UP SUPPORTS are attached to each corner and the remaining ones should be mounted regularely on the horizontal and vertical bars .
Insert the T-nut into the frame slot and position the SET UP SUPPORT according to the picture below. The additional opening of the SET UP SUPPORT has to be aligned with the screw of the clamp connector to get access for tightening.